SEWING DILEMNA? Ask Londa's FREE advice!!!

Yes...as a sewing educator for over 35 years, designer, and author with experience as a sewing machine dealer/fabric shop owner, custom dressmaker and more...I'm most happy to answer ANY and all questions to the best of my ability. Just contact me HERE with your question.
Showing posts with label sewing tips. Show all posts

Thursday, September 15, 2011

Londa's Comments on THREADS Magaizne #157

I LOVE THREADS Magazine!  I hoard it when it comes - keeping it 'saved' for 'me time'.  This week, I finally stole some time to thoroughly digest this most recent issue - November 2011.
WHY do magazines dated November arrive in August?????

Anyway - here I go, straight through from beginning to end - just MY thoughts, my experience, my opinions for what it's worth.

page 15.  Well - I just ordered myself Couture Sewing Techniques - and put it up on my website for sale.If you click on the link above, for a limited time, you'll save 15%!!!
Claire Schaeffer was the last celebrity I had at my retail sewing store in 2003 - so she is extra special to me.  She is a dynamo little lady who really knows her stuff!  An investment in this book would be a treat to yourself for many pleasant 'vicarious' sewing hours, as well as a great resource for techniques for years to come.

page 23.  Shirred Velvet jacket - beautiful!!!!  However, I think it would be even prettier if it had been created with 3 sections of  tucks rather than 4 sections. If I were to do it, I'd certainly use a very strong 100% polyester thread so that it wouldn't break when pulling up to gather.   Honestly, as beautiful as it is, having sewn on velvet more than enough in my 45+ years of sewing, I really don't think this project will go on my 'to do' list.  Sure fun reading and admiring it though.

page 31.  Personally, I don't care for the sleeves on Marfy blouse 2314.  Guess I'm old enough to remember the leg-o-mutton silhouette on sleeves and I just don't want to 'go there' again.  Pretty colors though.  But heh - don't think I'd carry that brown purse with this ensemble!

page 32. New Look 6028.  My French Loop or Italian Trim would either look beautiful on this Chanel style jacket.   
              Vogue 1220 - I just went to look up more about it at Vogue Pattern.com  and decided quickly that IF I needed a 'business' dress, the lines on this one are very interesting, but that I CERTAINLY would NOT make that wide belt - much less tie it in a bow on my tummy!   I think a self-fabric or skinny leather or metal belt at the natural waist would 'fit' much better with the tailored look of this dress.

page 33.  Colette Beignet 1005 - a new pattern line for me- I'd never heard of it anyway.  I like the skirt, but have NEVER liked a buttonhole that close to the hemline  I'd quickly eliminate that lowermost buttonhole and button. 

               Butterick 5575  looked intriguing, so I looked it up online.  As made up with the black ides and print center fronts and back, I do NOT like it.  My opinion is that it looks clowny.  Just mu humble opinion.  I also don't understand why put a tapered let on the women's size pant.  My feeling is that pegged pants make the hips look larger.  I prefer to balance a wide hip with a boot leg silhouette.

The Cover Stitch - pages 34-39.  Pam Leggett obviously knows her topic, and this is a great article if you're trying to decide if you need this feature in your sewing equipment.  Honestly, I have it on my Elna 744 serger and have NEVER used it!  Give me my twin needles and fusible stay tape - and I'm set to go.  Wanna race?  I can guarantee you it wouldn't take me 10 minutes to 'set the machine'. I know many have the cover stitch and love it - that's great.  Just not me, thanks.
#6 - page 37 - I would bury the threads rather than knotting and sealing.

#7 - page 37 - I would certainly use an applique scissors to trim - they help alot but do not INSURE that you don't nick through the outside of the garment.
page 38 - I LOVE that bias trim on the skirt!   The hints in the Basic Guidelines for Cover Stitching are all VERY important.  -especially starting with the needles in the fabric.  THAT I remember well from selling sergers with the cover hem.

page 39.  The scarf looks quite bulky to me.  If I did this technique, it would have to be on something very very lightweight and drapey...ala silk charmeuse.

page 40-47  Season Fashion Forecast
In a nutshell:
1. Think 'outfits' - 'ensembles'
2. hip emphasis (be careful here if you're hippy in the first place - for example, SKIP those fur cuffs as on page 41 photo at the top!)  So perhaps REAL defined waists are back as in the diagram ono page 41!?!  THAT will be hard to teach any 30 and under gal - WHERE her waist is!!!
3.  Shoulder emphasis - YEA - shoulder pads are back - jut natural - not huge.  IMHO if you have slanted shoulder, shoulder pads should ALWAYS be 'in'!
4.  Higher necklines - YEA - tell the female newscasters that 'decollette' -revealing tops and dresses are OUT and in bad taste, would ya PLEASE?!

5.  Jacket - wide lapels or NO lapels.  Then why didn't they sketch a wider lapel on the diagram??
6.  page 42 - I don't see how a 'slouchy pocket' can be slimming on anyone.....
7.  page 43 - LOVE that asymmetric burgundy sketched top!  I'm ready to LEAP into embellishment options for T's and TOPS after my fall show circuit - STAY TUNED!!!  I can't sleep for all the ideas I have, and my 'box' of design stuff in my studio is overflowing.....
So - that grey slouchy look at the top left is 'feminine' looking?  That's a new definition of 'feminine look to me - I call that 'sloppy'!
That orchid blouse with the full bishop sleeves, gathered shoulder and tie neckline looks like straight out of the 70's...I made MANY of these for myself and dress-making clients.  A very 'lady' look!
8.  Love all the textures - ala pages 44-45.  However, that Oscar de la Renta combo is a bit much for me...I'd skip all that jewelry - the top and skirt 'talk' enough, thank you.  AND - I do NOTget that green top underneath - and those too long slouchy sleeves sticking out - but heh, what do I know?!?/?
9.  page 46 - Black is NEVER gone - so how can it be 'back'???  Again - love the textures.  10.  Color palette - KNOW your colors!  Yellows are HARD to wear well.  KNOW your best pink and red - is it 'cool' - mauve-y, 'berry'  or 'warm - 'tomato-y'???  Better find out!

page 48.  Hand-Embroidered Understitching   - in my DREAMS I'd have time to do this - but if I had the time- Yea, I could enjoy it!

pages 52-55 Love that Bias Half Lining.  The old tailoring and dressmaking techniques are always worth a second look.  THANKS for this, THREADS and Louise Cutting!

pages 56-61.  I LOVE this all -lace red dress.  THIS may be my direction for New Year's Eve Ballroom Dancing gown this year!  I used many of these techniques with lace on my daughter's wedding dress(es!)

page 62-65.  INGENIOUS!!!!  WHY didn't I think of that??????????????  Very smart construction order - VERYsmart!   Way to go, Susan Pottage!

page 66-73 - interesting reading.  LOTS of effort for entertainment in my book.

page 73 - COATS  I looked up each of the patterns in the 'try thee Patterns' box...
Butterick 5297 - seems to be a VERY good basic, but UNLINED- which, in most cases, I would prefer lined personally
Classics 104 - Cecelia Podolak - seems she is designing for the larger woman - and pattern sizing reflects that.  Basics.
Elements 013 - Linda Kubik - LOVE the collar on 013.  009 with yoke and slot buttonhole in front yoke seam is also TRULY wonderful.  On my 'list' for when I need a new coat - either of these.
McCalls 4975 - basic, raglan sleeve nothing special imho
McCall's 9576 - basic, shawl collar, set-in sleeve, nothing special imho
Vogue 1145 - that's a BIG collar - too big unless you're at least 5'9'' or more! imho...
Vogue 8695 - cut-on Kimono sleeves - more of a 'jacket' than a coat I think, or a very lightweight coat.
Vogue 8539 - nice - fits that 'cocoon wrap styling from the style forecast article - but beware of the collar depth - if you don't have a long neck, you probably will want to decrease the depth of the collar or you'll feel strangled. 
page 74 - Preshrinking wool technique - never heard of turning off steam and re-pressing with a dry iron.  Sounds like it makes sense.  Always learning - always!

I'll never forget making a wool melton coat.  Melton is HEAVY.  I did a fantastic job, but then my machine could NOT make buttonholes!  I took it all over town looking for a tailor to make hand-worked or good machine buttonholes.  I honestly don't remember the end of the story - but it mustn't have been positive, because I don't remember wearing that coat!  lesson - if you are going to make a coat of HEAVY fabric - and your pattern requires a buttonhole, buy an eighth of a yard and play with buttonhole solutions FIRST! ;)

page 75 - Shows use of the duckbill applique scissors very well - middle right hand side.  I LOVE mine - and think every seamstress needs one.  HERE is a link to buy the applique scissors at my site.  


page 76 - It's Sew Easy new PBS series!  Little ole' me was on the 2nd program of this first series.  Read about my experience taping HERE.

Agree COMPLETELY with the Style Tips for length of skirts, and proportions with the longer skirts.  And I'd just decided to shorten some of my skirt - guess NOT!

page 77 - 'Measure of a Man" trivia - very interesting! Love things like this...tidbits of trivia along sewing lines!

page 78 - a Good Color Forecast - a good visual summary.  Now choose what is good for YOU.   


Friday, July 08, 2011

Baby Alyssa Ensemble

I've been so looking forward to sewing some little GIRL ruffles - and baby Alyssa,my sister's granddaughter born May 23 is just the excuse...

This little Sun Suit from Sew Beautiful, current issue No.137, 2011. Vol. 25, No. 4.

First, I show folding the back ruffles as directed. I KNOW my ruffles are cuter because I cut them on the BIAS rather than on straight grain as directed.


This is the back for Baby's bibbed sun suit. It has you hand wind elastic thread (without stretching) onto the bobbin, then stitch. Oh - and once you do this stitching as directed, it is important to hold a steam iron over it to make it all pull up as you see here. I don't like this technique - never have, as it doesn't hold up. I would rather advise to line with a soft fabric - even in this area only, sew casings, and run 1/8'' elastic through the casings. You'll be happier.


This is the sleeve ruffle - cutting an arc at one end, then using that as the pattern to cut the arc at the other end. I used fabric cut on the bias, and folded for the ruffles instead of eyelet trim or lace.


Here are my finished straps. See my gathering technique on You-Tube. Search for Londa Sewing...


Cloth Baby Booties

These are adorable Robeeze copy fabric baby booties. I found the pattern on a blog - www.stardustshoes.blogspot.com.

Here you see I have pulled the 9'' length of elastic through the Heel casing, and the wrong side of the Top through the slits, pulled to 7'', stitched, then the excess cut off. Note that the sides of the heel are NOT stitched to the sides of the Top/Sole seam. This took me a bit to figure out.


Ahhh - too cute! Now, I've trimmed the Sole to Top and Heel seam by pinking with pinking shears. I honestly think this is preferred to serging because tiny toenails could get caught in serging threads/loops. This makes it nice and soft inside, and solves the notching that is necessary to remove some of the bulk of the 'outie' seam allowance because when it gets turned right side out - that exterior most seam edge becomes an 'innie' curve as I say - needing less space. Understand?


Elastic joining scootched around so invisible. This shot shows the inside of the bootie really well.

Cute or what? Needs a bonnet....


Back View ...I just had to add the yellow ribbon on the straps and down the center of the butt ruffles.


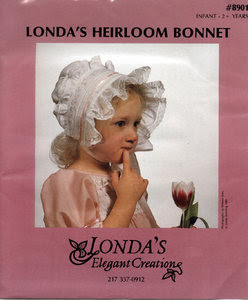
Londa's Heirloom Bonnet  -Kit 
SAVE on my combo of the pattern seen below, silk organza for back pouf lining, elastic, baby piping cord, safety pins. 


Creating the Fancy Band for the Baby Bonnet. Here is the first step of the Colonial or Candle Wicking Knot - I"m using 1/8'' wide silk ribbon. The white is adorable,delicate tatting I bought at the Martha Pullen Arlington Market I did in late June, 2011.


Next step in those Candle-Wicking Knots.


And...the last step in the decorative knot. I let my silk ribbon travel from one knot to the other on the back side of the Fancy Band as my pattern directs you to line this Fancy Band any way - covering it up.Note here you can see that I staggered the loops of the double rows of the tatting when I applied it. I carry the itsy bitsy piping cord at my website. You can see it at both edges of the Fancy Band. Yellow was obviously the 3rd, and accent color of this ensemble.

Just enough tatting left to put into the front edge of the front Ruffle on the Bonnet. Yeah!


Stitching the 'lining of the Front Ruffle - from the side where I can see the stitching of attaching the tatting - stitching just a needle width to the left of that stitching.


Cutting the arcs at each end of the Front Ruffle.


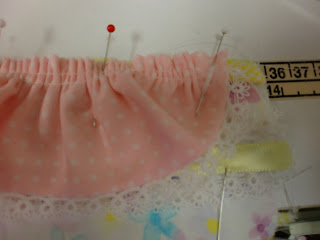
Using my gathering technique to attach Front Ruffle to Fancy Band. Note the threads figure 8'd around that right most pin. My You-Tube video can be found with all the rest of my how-to videos HERE.


Ahhh - too cute! I LOVE sewing ruffles. Dear Lord, send me a Grand Daughter to join my #1 grandson! Now to line the Fancy Band.


Sandwiching the Fancy Band/Front Ruffle unit with the Front Band Lining as per my really good directions in this pattern - my very first - done way back in1988!!!


Flipping Fancy Band Lining to the inside. See how nicely that baby piping just adds the little touch of color at each long edge of the Fancy Band - which, by the way sizes the bonnet. You just take earlobe over head to other earlobe (bottoms of each) and add 1/2'' for how long to create the Fancy Band - and approx 2'' to 2 1/2'' wide.


Drawing in side bonnet casing lines as per directions - on OUTSIDE of the Pouf.


At this time - I realized I hadn't cut a Pouf Lining (duh - I didn't have enough fabric!), so I went to my STASH and found the perfect silk organza for the ling - which is over the top of all this - the elastic pieces as directed, are secured. The left one is for the back pouf circlet and the right one (duplicated at the other end of the Pouf) is to pull the bonnet in at the bottom, neck edge. The Silk Organza was perfect because it is lightweight and ads just the perfect crispness to the bonnet.

This shows ripping a little hole at the X as at the top of the 2nd side of the directions in my pattern. This is the ONLY thing in these - my very first directions ever, that I would improve on - you can't really see the X in the diagram. It is at the left end of the Back neck Crown Edge - right above the words 'Center Back'. It is through this hole that the back crown elastic will exit. That gets anchor stitched, and eventually covered with a ribbon/button unit as you'll see.


My directions do instruct you to secure tiny safety pins onto the ends of each piece of elastic, so that you can easily pull the elastic through after the Pouf Lining is attached.


Oooo - I need a manicure! Anyway - securing the end of the elastic with machine stitching. Do at both 'sides' or bottom edges of the POUF.


Attaching Pouf to the back side of the Fancy Band. The pattern calls for a Back Ruffle as well as the Front Ruffle, but I just didn't think this bonnet needed the Back Ruffle. What fun is sewing...YOU are the designer!


Now it is time to stitch across each of the lowermost ends of the Fancy Band, securing the Lining to the outer Fancy Band. I designed an absolutely adorable technique to attach the Ties on the outside. See next steps!


How the bottom-most edges look all finished off.


1/4'' folded in on both sides of each tie. At the machine, finger fold in the little bit of extra. Establish where under the presser foot the right folded edge will be guided, and WALA, a beautiful, double folded and stitched edge! Do one side of each Tie.


Fold one end at an angle as shown. Now,stitch across this double layer at the other long edge, along the pressed line from the opposite side you see here.


Trim excess, turn right side out, pull out corner crisply with a pin and press. NOW finish the other long edge with same technique used on first long edge,but stop at this cross stitching.

Fold 3/4'' down to the wrong side at the other end of each tie. THEN fold it as shown.


Attach folded end with machine stitching as shown, then pull center fold down as you see here. Add a decorative Candle Wick Knot or French Knot inside for that special little touch.


Hand crocheted thread loops close the back of the Bonnet - at both the back crown elastic edge, and the lower edge. Ribbon streamers make it very 'girly'. I need to add my hand crochet method for thread loops to my YouTube Videos...


Finished ensemble. Now to wrap it and send it off. She's just a month old now - so this will be perfect for NEXT spring and summer. Can't wait to see baby Alyssa - my Grand Niece - first GIRL of the GREAT Grand Kids for my folks in it!


Londa's Heirloom Bonnet  -Kit 
SAVE on my combo of the pattern, silk organza for back pouf lining, elastic, baby piping cord, safety pins. 

Monday, June 20, 2011

Londa's Must Have Starter Sewing Notions

Londa's 'Must Have' Starter Sewing Notions

If you've decided to give sewing a try --- more than just stitching up rips and sewing on buttons --- these are the notions that I think you should invest in.....

  • Seam Ripper - I like this one for the big, easy to grip handle.
  • Water Soluble Marker - select fine or thick point
  • Applique Sharp Needles - Black/Gold from Clover sizes 9-12 - perfect size here for most hand sewing uses
  • Point Turner - my absolute favorite, simple tool to safely push out corners once you turn something right side out
  • Loop Turner - inexpensive, loop on one end for holding, hook on other...handy to hook onto elastic lost in a casing in addition to turning a tube!
  • Protect & Go Thimble from Clover - my favorite new thimble! Select size.
  • Double Needle Threader from Clover - one end fine, other side heavier
  • Steam a Seam 2 - paper backed 1/2" wide fusible web - a 'strip' of glue that bonds 2 fabrics together
  • Schmetz Needle Collection - Londa's favorite needles that will cover most any type of need based on fabric and threads
  • KAI 5135 scissors - small, but still large enough for quick clipping and trimming
  • KAI 5220 Shears - my favorite for cutting garments - invest in these to last a lifetime! Once you get 'hooked' you'll want to add a rotary cutter, cutting mat, etc.
I simply would NOT allow a student to 'fish' pins out of a tin in my classes...what a waste of time! AND, a 'pin' is NOT defined as those things that hold men's shirts together or a corsage on your jacket! Treat yourself to these wonderful PINS and a Pin CUSHION so you can easily and quickly retrieve them and store them as needed!
  • Ewesful Pincushion - sets flat, lubricates pins and needles at the same time. Saves time grabbing instead of in a 'tin'
  • Glass Head Pins from Clover - EZ to get hold of - won't melt with iron - perfect strength, yet fine enough for silks

Wednesday, May 04, 2011

Use for sweatshirt neck band!

A creative student proved me wrong....I always say I've never found a use for the neck ribbing of the sweatshirts as I create my Creative Sweatshirt Jackets. Well...while presenting a seminar/workshop at Fabrics Etc. 2 in Bensenville, IL last weekend, a clever student came to me with this rose!
1. Cut off the neck band from the sweatshirt.
2. Rotary cut off the seam allowance.
3. OPen it up so you have double the width.
4. Set a serger for a wide balanced stitch with decorative threads in upper and lower loopers. This was done with the WAVE STITCH on a BABYLOCK serger - which is a new wrinkle to me since my days of selling machines/sergers ended almost 8 years ago now!
5. Gather remaining end and twirl and stitch into a rosette.
WALA....... WAY TO GO!
Sorry I forget the name of the student who did it - Cindy perhaps?

Had lots of fun at this candy store of a quilt/machine shop! What a nice owner - Mary Forte, and her helpers/associates. If you're ever in Chicagoland - don't miss Fabrics Etc. 2 in Bensenville!

Posted by Picasa

Sunday, December 12, 2010

New Year's Eve Dress


OK - I get to sew a regular pattern again! Yea - I think?! My hubby and I do ballroom dancing (NOT DWTS type - but social) at a neighborhood dance hall and NYE is always fun and dress up. What fun!
I found this luscious embossed velvet/lycra knit while in Atlanta at the American Sewing Guild Conference back in August.
The embossing is in rows - and I made necessary decisions this afternoon - and even got to crawl around on the floor to cut it out!
I strongly considered what pattern to use. Gee - it is sure nice to be able to cruise the patterns availalable from my ez chair online! I had purchased a Burda pattern, but then saw it made up and photo'd online, and decided the twisty thing on the bodice was too bulky - and out of this napped fabric, it would be VERY much too bulky.
This pattern presented some challenging decisions as well.
1. It has nap - so which way to cut it??? Even though I knew it would look 'richer' with nap running up (as I run hand down my skirt - it would be rough - I really liked the softer red color of cutting it with nap running down.
2. At first I thought I would do the center view - C - where the skirt is fuller - becuse the other skirts are cut on the bias - but I ultimately decided to actually use the somewhat slimmer skirt and yes - to cut it on the bias! The fabric being a knit - it is very heavy - and i was just afraid that much skirt would be really TOO much trying to dance. Holding it up - I think it will look just fine - and even though the embossings are in 'rows' - I think I will be the only one who would ever notice this.
3. The midriff shirring - was also is designed to be cut on the bias - and I understand that - but I have had experience with that concept on other gowns - and it never seems to work right - I always have to pull it much tighter to get it to look right - and with this being a knit - I just didn't think it would work. So - I decided to cut it so that the least amount of stretch - lengthwise grain - would be going around. This area is exeuted on a base of lining. So - that is what I decided - will continue to post as I stitch and fit and you'll find out how it all goes.
Typical - I lost one pattern piece - and DH found it in the garbage with other tissue scraps.
AND - I was thinking so hard about getting the skirt out of the fabric - matching, etc., that I realized AFTER I cut it that I cut the FRONT piece 4 times - instead of 2 and the BACK 2 times. However, comparing the front and back pieces, I found VERY little difference, so I think I'll be OK actually.
I do have enough fabric left over to recut the back skirt if need be - but I'm excited that I have enough left to make either a neat jacket, or a great top - so I'm hoping that the skirt will work out.
Sewing it should be fun....stay tuned! OH - and that Roll the Gold Titanium Rotary cutting blade once again worked like a charm to cut what I could that lay on my 4s x 80 cutting mat on the floor. For the rest of it - I was testing my new KAI Modified Serrated blad scissors - 5220~ WOW~ !!!!! Watch too for more info on that new product!

Next Progress Installment...

Well - right off the bat, as I lined the bodice, it was obvious AGAIN how lousy directions are - even Vogue! Unless you would trim the armhole seam allowance VERY close - it would not, could not turn nicely without CLIPPING into the seam allowance at the curve - several times!!! The reason is that this edge - the cut edge, as it is inside out - is the INSIDE of a circle - smaller than what it will become when it turns right side out - that same edge will become the OUTSIDE of a circle - larger, and the only way it can do that - to make that edge larger, is to clip it so that it can spread - to get larger.

By the way - this bodice was well designed - cut on the bias, so that the angled front edge is on the straight grain. When cutting the lining, I utilized the non-stretchable SELVAGE for that edge - thus stabilizing it very well.

I really like this bodice - and the back strap that loops through the neck back facing that attaches to the front bodice straps. I may well use it on a sundress next summer. I think it is really pretty flattering - and could certainly be cut higher at the center front so as not to show cleavage.

ANYWAY...typical, the method of joining the narrow front bodice straps to the neck facing in the back is BAD - and, as I see it - darned near impossible. However, I see it done this way over and over and over.

I recommend NOT stitching the edges of the Front straps all the way to the top ends, but rather to STOP the stitching at both sides of the Front straps at least 2" away from the top small end. Do the same for the ends of the back facing - stop 2" away from the ends.

Doing it this way allows you to easily stitch the 2 'outside' surfaces (in this case, the back neck piece to the front strap extension). After doing that, you should trim down this seam allowance, and then either press it open, or towards one way or the other - grading it first to 'graduate the bulk' and THEN turn under the seam edges of the ends of the Lining, and then slip slipstitch the lining ends together, and also slipstitch along the remaining unstitched edges along both sides.

This worked really well for me, and I pressed the graded seam towards the bodice because there is a tuck there anyway releasing fullness.

I then worked VERY hard and got the midriff all shirred beautifully. Cutting it on the straight grain - going around the waist worked well to make it NOT stretch. HOWEVER, I'm long-waisted, and had adjusted the midriff pieces adding 1.5" before cutting. THAT plus some extra 'flesh' that has crept on made for a 'creative challenge' as when I tried it on - I lacked about 4+ inches as the bottom most edge of the midriff edges meeting!

Oh well...that much bulk going horizontally around my midriff wasn't that flattering anyway - even if it did fit. Sew... onto some 'design adjustments'.....

It was clear that all I had to do was hike up the top of the skirt edge, making the midriff area 3" deep instead of like 12" deep - and I liked the look of it. That also made it fit around very nicely. I also played and decided that some vertical seaming or stitching through the expanse of the front shirring would be nice - dividing that midriff area in the front into 3 sections. I did that by hand-basting through the depth of the midriff to then pull it up and then machine stitched through the outer velour and base lining. Here's what it looks like now...

And the back - the invisible zipper took some work, but finally got it in nicely. It is an orangey red that doesn't match at all - so I'm going to the drug store with a sample in hand to match some nail polish to paint the zipper pull tab.

A hook and thread eye at the very top holds it together nicely, It is amazing to me how very far from the zip that the hook needs to be stitched. I find to do the thread 'eye' first works best. Then you 'hook' the hook part in and pull it over so that the edges come together as you desire in order to determine exactly where to stitch on that hook. AND - you MUST stitch a few times entirely through to the outer side so that the hook doesn't pull on the lining edge inside only.

Speaking of that lining edge inside - see on the picture to the right that I decided to 'engineer' a rectangle of lining, edges folded in - along the zipper edge on the inside of the upper bodice at the back. I think this worked out better because the lining of the upper bodice really couldn't finish off the zipper here, as the directions had you basting the lower edges together first - before stitching the shirred midriff section to it.

You can also see in this photo that the inside of the midriff section has not been completed. I feel that the horizontal seam allowances need to be hand catch-stitched to the midriff base layer to hold them in place first. THEN the midriff lining can be hand-stitched into place. I'm actually inspired to say NO to all holiday cookies and to really hit my 'Abdoer' exercise machine even more, so I'm gonna leave this open for now and hope to have to take it in at the side seams. THEN I'll finish it off inside.

also had seriously thought about adding godets in the skirt seams anyway, so I went ahead and did that - un-stitching each seam for the lower 20" or so and adding godets I drafted. The center of each 'cone' shape is the length needed - on straight grain - like the radius of a circle, and the bottom then is the outer edge of a circle. I decided that I wanted the bottom edge of the godet - that circumference edge - to meausure 20". That was easy to draft - then added seam allowances, and stitched into each of the seams - center front, back, and each side seam. Doing this added a nice 4 times 20 = 80" to the 'dancin' hem!

AND - you may not believe this, but since this is a knit, and knits don't ravel, I've decided the 'in' and EZ and smart thing to do is to leave the hem as a cut edge! I'll make you a bet that not a single person will come up to me NYE to tell me I forgot to 'hem' my dress!

So - done I think, until a day or so before - when I do final fitting of the midriff and finish off the inside with the midriff lining.

ONLY decision left is to decide on jewelry. I have nice rhinestone earrings an necklace...or gold an ruby-type stones.


Thursday, October 14, 2010

HUNT for reversible knits!

One of the most fun parts of doing the Sewing Expos is seeing all the neat clothing on our fashion-conscious customers! Often self-created, but also store-bought (RTW = Ready-To-Wear). I always keep my camera handy and when I ask permission, most often the wearer is flattered and I get to take pictures. This is really where I get lots of the ideas that end up in my Creative Sweatshirt Jacket Talking Patterns™. I honestly forget if this gal was at the Novi or the Chantilly shows I just completed, but the 'dust has settled' and I'm wading through ideas I got at those shows.
Check out this jacket - it is a single knit - meaning that the crosswise edge WILL curl - usually to the right side - and that means also that the knit itself looks like stockinette stitch on one side, vertical, and horizontal ribs on the reverse side. That being said, this jacket was made of one of those knits which, in addition, had a different character on both sides - dark grey heather on one side and lighter grey on the other. Anyway - FIRST- a straight UN-pleated strip of the same fabric, with the opposite side up - about 1.5" wide was stitched down along the hemline, stitching about 3/4" from the top raw edge. . (To keep the knit body from stretching out of shape ala 'roller coaster' look, I would advise STAYING where you are going to stitch, on the INSIDE with Straight Fusible Stay Tape.) Then - kinda like all the rag quilts, the 3/4" edge above the stitching was simply cut into every 1/2" or so perpendicularly TO the stitching.

THEN - the box-pleated row ruffle was added on top - opposite side of the fabric 'up'. The 'ruffle' was really box pleated row of trim - cut about 2.5" wide, cut edge 'finishing' both edges. If I were going to mark and stitch all that, I would certainly make use of the Simflex Gauge to do the marking - as this wonderful crazy tool automatically evenly spaces things. It appeared to be stitched about 1/2" from the top edge, right on top of the other trim's stitching, and then the opposite side flopped down over top of the stitching creating the 'double' row of light colored fabric you see. Remember- raw edges everywhere, as knits do NOT ravel!


Look at the collar - it appeared to be a double layer - with 'wrong' or light sides together, simply stitched about 1/4" away from all the edges.

Next, check out the little gathered ruffle, raw edge, stuck into the top of the sleeve cap seam. Then, the diagonal row of embellishment down the center fronts appeared to be a hand-whipped strip of rolled fabric.

Finally, up the Center Back, it was stitched wrong sides together, seam allowance exposed on the right side to emphasize a nice slimming vertical line. RAW edges again!


So thanks - whoever you were - I lost your name, sorry! But be sure we appreciate your great taste i RTW!
If you find a great reversible knit online, post it as a comment for the rest of us here at this post. Remember, I must approve all posts before they show up - so feel free to send me a quick email alerting me that you posted. londa@londas-sewing.com.

Sew.........beware when you visit my booth - I just may photo and 'pick' at your great clothing!